This Blog Post is an excerpt from the Ebook ‘Your complete guide to the varroa mite‘. To get your free copy, click here.
Monitoring the level of varroa infestation is the basis of sound varroa management. Without a system of monitoring in place, there is no way of evaluating the stress related to varroa infestation, or the effectiveness of a particular treatment.
How frequently you should monitor your colonies depends upon several factors such as density of colonies in your region, the treatment processes of other beekeepers in your area, the particular resistance of your bees to varroa, and also the weather. Due to these variables, there is no one size fits all answer, though it is safe to say the more information you have, the better.
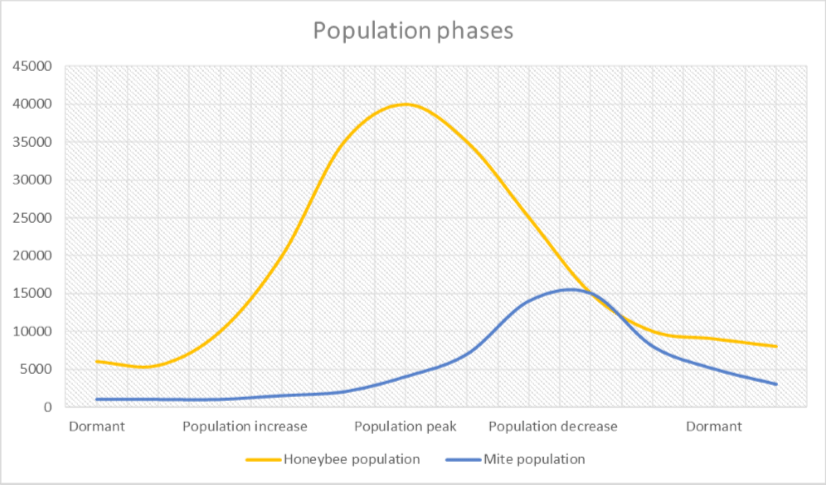
At a minimum, one should check during the population increase phase. This enables you to get an idea of the infestation level at the start of the season. If the colony displays high levels of varroa at the beginning of the season, immediate action is required. During the population decrease phase, the colony prepares for winter where it will be dormant. As it is not advisable to treat the colony over winter, monitoring is again necessary to ensure there are not high levels of varroa heading into this season.

There are several ways to monitor the level of varroa infestation in your hive. The two primary methods are the sticky board method, and the powder sugar method. The simplest is the sticky board. For more precise measurements, the powder-sugar method is recommended.
It is important to note that with each monitoring method, we are looking for the percentage of mites per bee instead of the total quantity of mites, as the size of a colony will vary throughout the year.
Sticky board method
A sticky board (or monitoring board) is a grid protected sheet covered with a sticky substance, placed under the hive. For this method to work, you need to have a screened bottom board. Mites fall from the hive, through the screened bottom board and onto the sticky board where they can be counted. This is the easiest and least intrusive way of checking on your colonies; however, it is not the most accurate. Results from this method should therefore always be interpreted as an estimate rather than a precise amount.
Equipment required
Sticky monitoring board. Available at all beekeeping outlets. It is also possible to make it yourself, by covering a sheet or piece of cardboard with a sticky substance such as Vaseline.
Sticky board procedure
Step 1 – Placing the sticky board
Place the sticky board in the space beneath the screened bottom board. Leave it there for 3 to 7 days.
Step 2 – Remove the sticky board and count the mites
Gently remove the sticky board and count the mites present. It is normal for debris to fall from the hive onto the sticky board, but this doesn’t present any problems.
Interpretation
When you have counted the total number of mites, you can calculate the daily mite fall. Simply divide the number of mites by the amount of days the sticky board has been laying beneath the hive. The daily mite fall can give an indication about the varroa infestation of your colonies. Though this number is not a precise reflection, it can highlight when varroa levels suddenly increase or decrease. This makes it a useful tool to evaluate the effectiveness of a treatment.
Population increase (Spring) 5-10 daily mite fall
Population decrease (Autumn/Fall) 10-25 daily mite fall
Powder sugar method
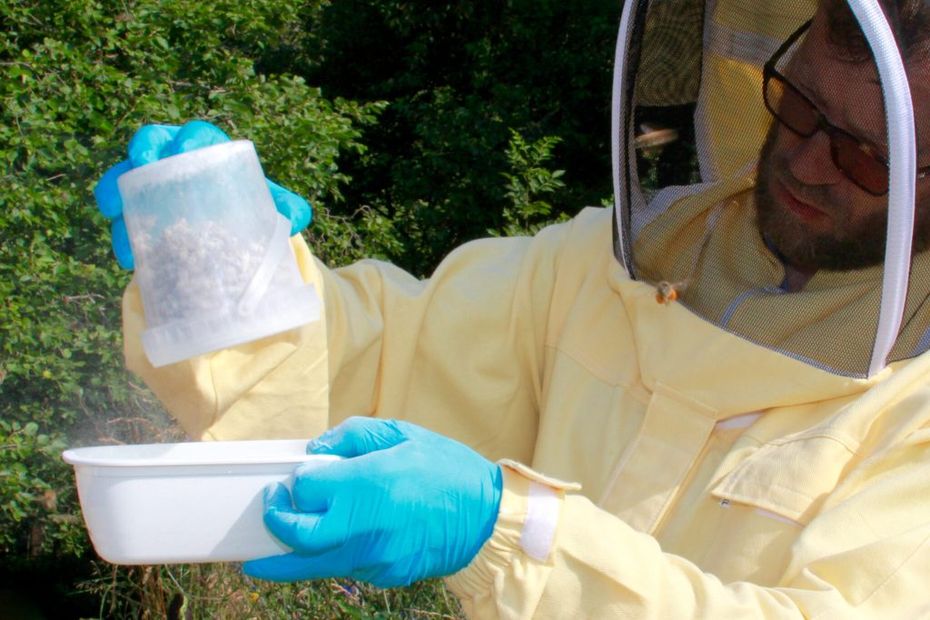
Another more accurate monitoring method is the powder sugar method. The trade-off is however, that it requires far more time to conduct. Here, 300 bees are collected in a jar, with a sieve acting as lid. The bees are then covered with powder sugar. The powder sugar causes the mites to loosen their grip on the bees. By shaking the jar, the mites will fall through the sieve and can then be counted. This method has to be conducted on dry days or indoors, as the powder sugar loses its effectiveness when wet.
Equipment required
Cup or Jar with a sieve holes should be 2-3 mm
Small container filled with water
Weight scale
Powder sugar and spoon
Powder sugar procedure
Step 1 – Find suitable brood frames
Remove the lid of your jar. Open the colony and find frames with developed larvae, which will be capped in the coming days. Optimally the sample includes bees from multiple brood frames, as this allows you to get a more complete view of the state of the colony. Be careful not to include the queen. The test is stressful and could potentially hurt her. Also try to limit the use of smoke as smoke can agitate the bees, making their collection more difficult.
Step 2 – Collect the bees
Collect a sample of approximately 300 bees and put them in a jar. The bees should half fill the jar to assure enough space for the sugar to be distributed thoroughly. The easiest way to do this is to gently wipe the bees directly from the comb into a funnel with the jar situated underneath. Another way of collecting the bees is by scooping them directly from the frame with the jar. Slowly and gently move the jar along the frame and let the bees fall in.
Step 3 – Weigh your sample
To confirm whether your sample consists of approximately 300 bees, you need to weigh it. A single bee weighs around 0.1 gram, which means that an adequate sample size of 300 bees will weigh around 30g.
Step 4 – Apply powdered sugar and shake gently
Pour the powdered sugar through the holes in the lid, so as to coat the bees. Usually 2 tablespoons will do the trick. Check that all bees are well covered in sugar. Shake the jar gently for 1 minute to make sure all the bees are completely covered. (If this does not coat them, a more vigorous shake will be ok).
Step 5 – Wait
Put the jar in the shade (to prevent the bees from getting too hot in the sun) for about 3 minutes. During this time the mites will detach from the bees. (This waiting period provides a great opportunity to clean up a bit and return the frames back in the colony). Take your time, do not rush the 3 minutes, if you are too quick, the count may not be accurate.
Step 6 – Release the mites
Hold your cup above the container filled with water. Put the cup upside down so that the mites can fall through the holes, and then start shaking. Even though it might feel a bit harsh, shake vigorously until you don’t see any mites falling out. Be careful with any wind. This step is best completed indoors when it is too windy, to prevent mites from being blown away.

Step 7 – Counting
Count the number of mites present in the water
Interpretation
In order to estimate the percentage of infestation, calculate the number of mites per 100 bees. For a sample containing about 300 bees, divide the number of mites you find by three. For example, if you count 9 mites:
9/300 = 0.03, which equals a 3% infestation level.
The number of mites per bee gives you a good idea of the state of varroa in the colony. Regardless of its size or hygienic behaviour of the colony. However, as this test focuses on adult bees we still have to account for the difference of varroa present in brood.
As more varroa are located in the brood in spring, you will naturally find a lower infestation level compared to autumn. Therefore, we advise the following damage threshold.
Population increase (Spring) 2-3% Infestation
Population decrease (Autumn/Fall) 3-5% Infestation
Once you have checked your colonies for varroa infestation, you are better equipped to take the best course of action. To learn more about varroa and the different treatments available, download the free ebook ‘Your complete guide to the varroa mite’.